How To Install PowerOLAP Add-Ins Manually
There are two PowerOLAP add-ins that you will need to manually add: PowerOLAP Core.xll and PowerOLAP.xla.
You will first need to add PowerOLAP Core.xll. In order to determine where it is located you must first determine whether you are using 32-bit Excel or 64-bit Excel. In Excel, go to File->Account->About Excel and you will see the below screen:

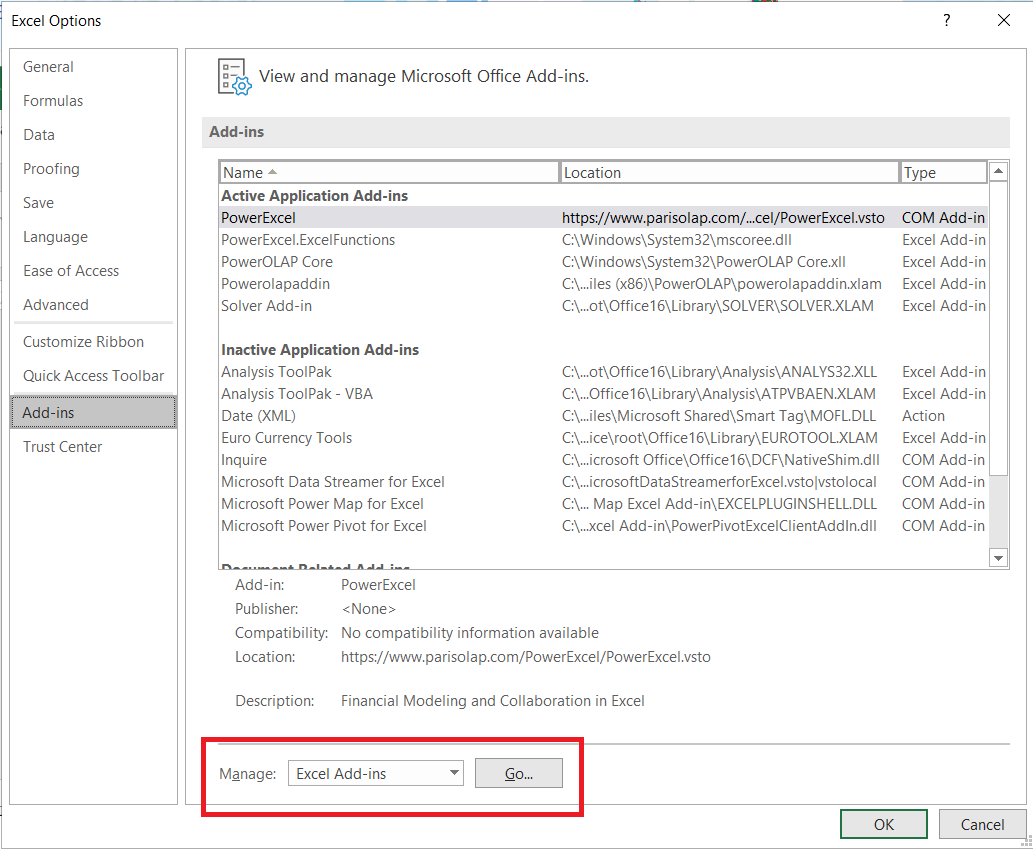
Now that you know which version you are using, go to File->Options-Add-Ins and you will see the below screen:

Click ‘Go’ and then ‘Browse’ and you will browse to the location of the file. If you are using 32-bit Excel, the path will be: C:\Windows\SysWOW64\PowerOLAP Core.xll. If you are using 64-bit Excel, the path will be: C:\Windows\System32\PowerOLAP Core.xll.
After adding this, your PowerOlap version will determine which add-in to browse for next.
Version 16 or below:
we now want to add the PowerOLAP.xla.
Go to File->Options-Add-Ins->Go->Browse again and this time the file is located at C:\Program Files (x86)\PowerOLAP\PowerOLAP.xla (this is the default PowerOLAP directory location).
Version 18 or higher:
we now want to add the Powerolapaddin.xlam.
Go to File->Options-Add-Ins->Go->Browse again and this time the file is located at C:\Program Files (x86)\PowerOLAP\Powerolapaddin.xlam (this is the default PowerOLAP directory location).
With both add-ins added you should be all set to use PowerOLAP with Excel.
